Why Does Kitchen Air Conditioning Always Get “Stolen”? The Disassembly of Water-Cooled Fresh Air Fans and the Breakthrough Path for Commercial Kitchen Air Conditioning
Introduction: When Kitchen Cooling Gets Sucked Away by Exhaust, the Problem Goes Far Beyond Discomfort
In commercial kitchens, chefs often complain: even with the air conditioning cranked up, standing in front of the stove still feels like a blast of heat, and the cool air seems to be “instantly sucked away” by the exhaust hood overhead. This is no illusion—the exhaust system, moving thousands of cubic meters of air per hour, carries away grease and heat while ruthlessly pulling out the conditioned air, creating a “cooling short-circuit” effect. According to industry tests, in kitchens without optimized airflow design, cooling loss rates can exceed 40%, not only driving up energy consumption but also keeping the kitchen environment in a high-temperature, high-risk state.
To truly solve the industry pain point of “kitchen cooling being sucked away by exhaust,” we cannot rely solely on cranking up the AC capacity. Instead, we must address three dimensions: airflow compensation, equipment selection, and installation and maintenance. This article starts from the application scenarios of commercial kitchen air conditioning, delves into how water-cooled fresh air systems can lock in cooling, and provides a professional, actionable guide for the high-frequency maintenance issue of “how to disassemble a water-cooled fresh air fan,” helping kitchen operators and maintenance engineers build a systematic understanding.
1. Why Does Cooling Always Get “Hijacked” by Exhaust?—Three Imbalances in Kitchen Airflow Organization
The airflow environment in a commercial kitchen is far more complex than in ordinary spaces, with the core contradiction lying in the dynamic balance between “exhaust” and “makeup air.” The exhaust system is the kitchen’s “respiratory organ,” but if fresh air makeup is insufficient or poorly positioned, negative pressure forms, forcing conditioned air toward the exhaust outlet and creating an ineffective cycle.
1. Exhaust Volume Far Exceeds Fresh Air Volume, Creating a Strong Negative Pressure Zone
According to the “Dietary Building Design Standard,” kitchen exhaust volume is typically designed for 40-60 air changes per hour, while standard AC fresh air volume is only 10-15 air changes per hour. When makeup air is insufficient, negative pressure forms inside the kitchen, pulling hot outdoor air in through door and window gaps while accelerating the draw of indoor cool air toward the exhaust hood. The solution is to add a dedicated “task-specific makeup air system” that delivers treated fresh air directly around the cooking stations, both compensating for the air removed by exhaust and forming an air curtain to block the rising path of hot grease-laden fumes.
2. Improper Placement of AC Supply and Return Air Outlets Causes Cooling to “Sprint” to the Exhaust Hood
Many kitchens install AC return air outlets near the exhaust hood area, causing freshly supplied cool air to be immediately sucked back, or the supply air jet directly hits the edge of the exhaust hood, leading to “cross-draft” loss. The professional approach is to adopt a “low-side supply, side return” airflow pattern: supply outlets are placed about 2.5 meters above the chef’s work area, angled downward; return outlets are positioned in low-level areas away from the stove, guiding cool air to pass through the occupied zone before recirculating.
3. Exhaust Hood Design Lacks the “Air Curtain” Concept
High-end commercial kitchens now commonly use “exhaust hoods with makeup air functionality,” which feature slot supply vents around the hood perimeter to create a high-speed air curtain that both blocks grease from escaping and reduces heat exchange inside the hood. However, many existing kitchens lack such equipment, requiring adjustments to AC supply angles or the addition of guide vanes to keep cool air away from the positive pressure zone of the exhaust hood.
2. Water-Cooled Fresh Air Fans: The “Invisible Guardian” for Locking in Cooling in Commercial Kitchens
In systematic solutions to prevent cooling loss, water-cooled fresh air fans play a key role. Unlike traditional direct-expansion air conditioners, water-cooled fresh air systems use a cooling water loop to remove condenser heat, achieving higher energy efficiency and without discharging hot air into the kitchen—making them ideal for commercial settings with dense stove lines and high heat output.
1. The Dual Mechanism of Water-Cooled Fresh Air: “Makeup Air + Cooling”
Water-cooled fresh air fans draw in outdoor fresh air, cool and dehumidify it via a water coil, and then supply it into the kitchen under positive pressure, simultaneously compensating for the negative pressure caused by exhaust. With supply air temperatures controllable at 20-24°C, they not only provide comfort but also create a “low-temperature air cushion” around the cooking stations, effectively reducing radiant heat impact on chefs. More importantly, the makeup air volume can be precisely matched to exhaust volume, fundamentally eliminating the physical conditions that cause cooling to be “sucked away.”
2. Brand Selection and Engineering Adaptation Points
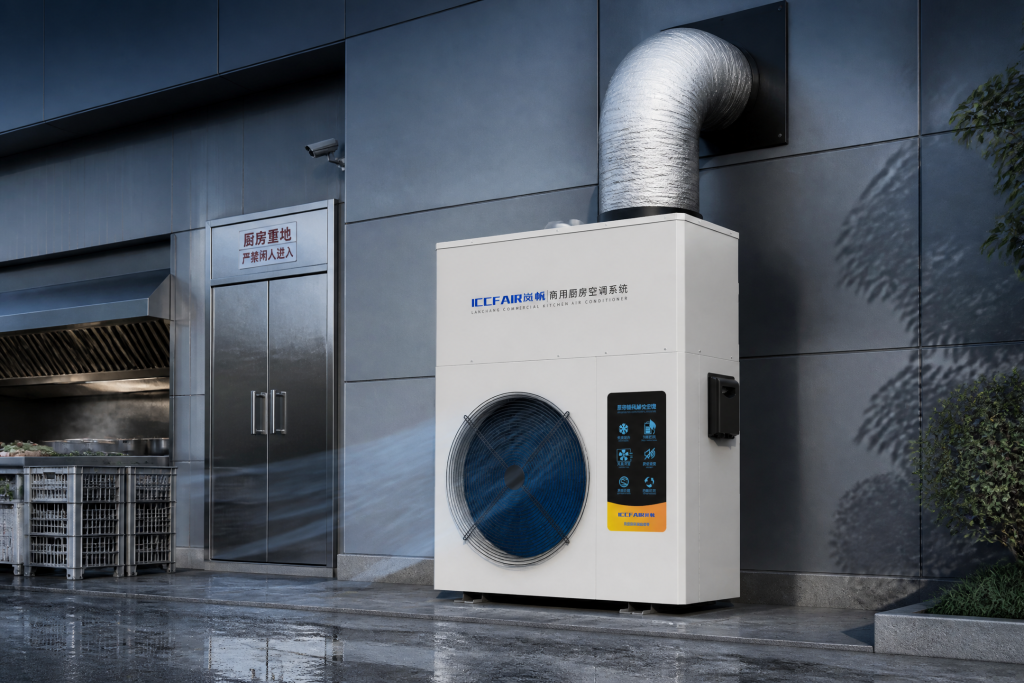
When selecting commercial kitchen AC and fresh air equipment, top ten brands recognized in the market often offer more comprehensive after-sales support and parts availability. For example, LCCFAIR Lanchang’s water-cooled fresh air units feature double-inlet centrifugal fans and high-efficiency cooling coils, capable of handling high grease environments, with modular designs that facilitate later maintenance. Key selection criteria include: first, whether the airflow can be linked with variable frequency control to the exhaust system; second, whether the water coil material is corrosion-resistant (kitchen air contains acidic grease); third, whether explosion-proof motors are included (for areas with open flames).
3. Practical Guide: How to Disassemble a Water-Cooled Fresh Air Fan?—Safety, Steps, and Pitfall Avoidance
No matter how excellent the equipment, long-term operation requires filter cleaning, coil descaling, or motor inspection, making “how to disassemble a water-cooled fresh air fan” a required skill for maintenance personnel. Incorrect operation can not only damage the equipment but also cause refrigerant leaks or water system contamination. The following disassembly process is based on a typical LCCFAIR Lanchang horizontal unit and applies to most domestic brands (but always cut power and close water valves first).
1. Pre-Disassembly “Three Cuts and One Hang” Preparation
First, cut off the power supply and hang a “Do Not Close” warning sign; second, close the inlet and outlet water valves, then open the drain valve to empty residual water from the coil to prevent splashing during disassembly; finally, confirm that the fresh air damper and exhaust damper are closed. Prepare tools including: Phillips/flathead screwdrivers, socket wrenches, hex keys, rubber mallet, pry bar, and a magnetic tray for small parts. Never loosen flange bolts under pressure, as this can twist water pipes.
2. Step-by-Step Disassembly: A “Surgical Operation” from Housing to Core Components
Step 1: Remove the access panel and side panels. Most horizontal fresh air units have access doors secured by clips or M6 bolts. After loosening the bolts, tap the edges gently with a rubber mallet to release the seal gasket, then pull the panel outward horizontally. Note that panels can be heavy; support them with both hands to avoid dropping and damaging the coil fins.
Step 2: Disconnect electrical wiring and label. Open the electrical box cover, use a marker to label each terminal (e.g., L1, N, PE), take photos of the original wiring, then loosen terminal screws one by one and pull out the wire harness. Bundle wires with zip ties to prevent friction against metal plates.
Step 3: Remove the fan volute and impeller. First, remove the bolts on the inlet flange, then shift the volute about 3 cm toward the motor side to disengage it from the duct flange. Next, use a hex key to loosen the impeller locking screw (note the direction—left or right hand thread), and use a puller tool or two flathead screwdrivers symmetrically to pry the impeller off the motor shaft. If the impeller is stuck due to grease, do not hammer it forcefully; spray rust remover and let it soak for half an hour before attempting again.
Step 4: Extract the cooling coil (water coil). The water coil is typically secured by U-bolts on both sides. After loosening the bolts, slide the coil to one side to disengage it from the locating pin on the other side, then slowly tilt and pull it out. Wear gloves throughout, as fin edges are sharp; also avoid bending the coil, which would cause uneven water flow.
3. Reassembly and Commissioning: The “Reverse Thinking” That Matters More Than Disassembly
After cleaning or inspection, reassemble in reverse order. However, note: any seals that are aged or hardened must be replaced; the gap between the fan impeller and volute should be uniform to prevent scraping noises; wiring must match the original labels exactly, otherwise the motor may run in reverse. Finally, open the water valves and bleed air, then start the fan after water flow stabilizes, checking for leaks, abnormal noises, or vibration. It is recommended to run for 15 minutes initially and use a clamp meter to verify the motor current is within the rated range.
4. Scenario-Based Solutions: Systematic Retrofit from “Cooling Being Sucked Away” to “Cooling Locked In”
For existing kitchens, there is no need to start from scratch. A three-step retrofit—”makeup air first, zoned supply, intelligent linkage”—can significantly improve conditions. For example, in a chain restaurant central kitchen, the original setup used four 10-HP cabinet units, yet the cooking station area still reached 45°C. After introducing LCCFAIR Lanchang water-cooled fresh air units and optimizing airflow, the cooking station temperature dropped to 33°C, while AC energy consumption fell by 22%.
In implementation, makeup air volume should be calculated based on kitchen area and exhaust volume (typically 70%-80% of exhaust volume), and fresh air supply outlets should be prioritized above and behind chefs to create a “cool in front, makeup behind” microclimate. Additionally, existing AC return outlets should be relocated to the corner farthest from the exhaust hood, and motorized dampers should be installed and linked to the exhaust fan—when exhaust starts, the fresh air damper automatically opens wider to keep negative pressure under control.
Furthermore, for projects using water-cooled fresh air systems, it is recommended to clean the water system filter quarterly and disassemble and clean the fan impeller and coil fins semi-annually. With proper maintenance, the unit’s lifespan can exceed ten years, far surpassing the roughly five years typical of split air conditioners.
Conclusion: Make Every Cubic Meter of Cooling “Worth Its Salt”
Commercial kitchen air conditioning and fresh air systems are never isolated equipment but rather a precision-engineered airflow project. The root solution to “cooling being sucked away by exhaust” lies in respecting the physical laws of exhaust and makeup air, with the right fresh air equipment serving as the “ballast.” Mastering the practical skill of “how to disassemble a water-cooled fresh air fan” ensures the equipment remains efficient, avoiding the pitfall of becoming a decorative fixture due to poor maintenance.
From selection to installation, from commissioning to maintenance, every step tests the professionalism of the team. If you are troubled by kitchen heat, excessive energy consumption, or equipment maintenance issues, perhaps start by re-examining your makeup air system—a high-quality water-cooled fresh air unit might just turn things around. After all, amid the flames and grease, a steadfast commitment to coolness is not just about comfort but also about safety and product quality. We welcome you to explore engineering cases from industry leaders like LCCFAIR Lanchang to obtain customized airflow solutions tailored to your kitchen. Action always carries more warmth than waiting.