Kitchen Cooling Retrofit Guide: The Truth About Disassembling Evaporative Air Coolers and the Best Ventilation Solution for Restaurants
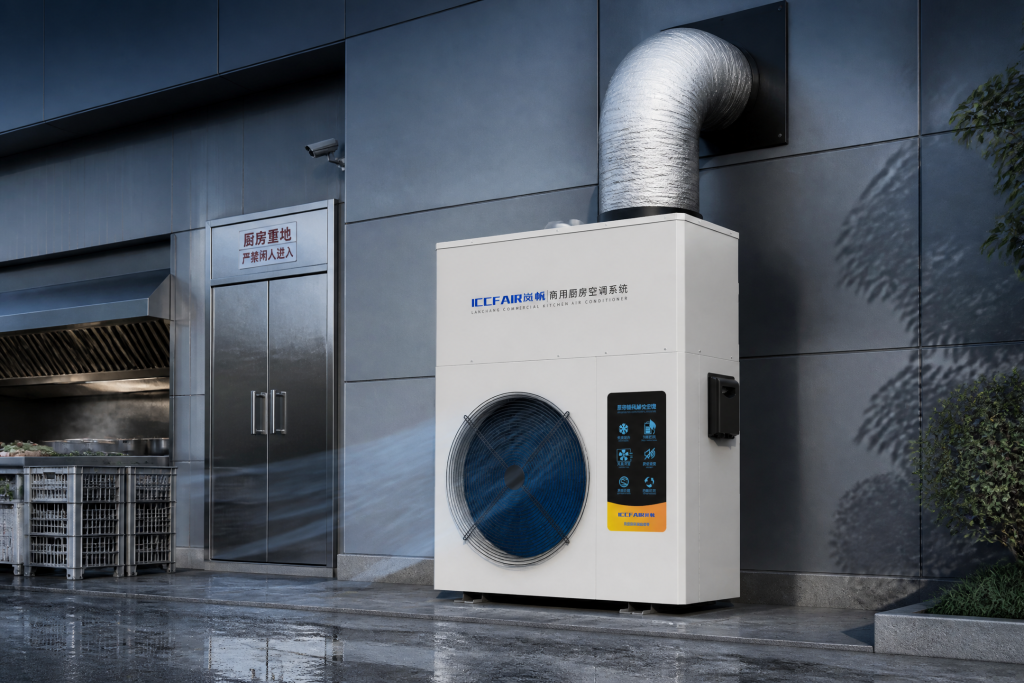
What Is an Evaporative Air Cooling System? Why It’s Becoming the New Favorite for Commercial Kitchens
In the sweltering environment of a restaurant kitchen, traditional air conditioning often falls short. Evaporative air cooling systems, however, use the principle of evaporative cooling—where water absorbs heat as it evaporates—to cool outdoor air before delivering it indoors while simultaneously expelling cooking fumes and hot air, achieving both ventilation and cooling. Compared to Freon-based air conditioning, evaporative coolers have lower upfront costs and save about 30% on electricity, making them especially suitable for high-temperature, oil-fume-heavy commercial kitchens. Yet many owners, when purchasing or maintaining these systems, often get stuck on practical issues like “how to disassemble the evaporative cooler fan” or puzzle over the cost-effectiveness of “installing an evaporative cooler in a fresh air system.”
In reality, an evaporative air cooler isn’t a single device but a system composed of a fan, evaporative cooling pads, a water pump, and ductwork. Its core advantages are: first, it uses water circulation for cooling without a compressor, keeping power consumption low; second, it continuously introduces fresh air, reducing CO₂ and cooking fume concentrations in the kitchen; and third, its relatively simple structure means maintenance isn’t overly demanding. But precisely because of this, installation location, ease of disassembly, and water quality management directly impact the user experience. Below, we’ll dive into a detailed guide covering disassembly techniques, suitability assessment, and overall restaurant ventilation strategies.
How to Disassemble an Evaporative Cooler Fan? Three-Step Practical Guide and Precautions
“How to disassemble the evaporative cooler fan” is often the first hurdle kitchen equipment managers face when cleaning or repairing the unit. Improper disassembly can damage the cooling pads or, worse, cause water to enter the motor and short-circuit it. First, always cut off the power supply and close the water inlet valve, then drain any remaining water from the tank to prevent water from splashing into the electrical box during disassembly.
Step 1: Separate the Duct from the Unit
Use a screwdriver to remove the clamps or self-tapping screws at the duct connection, then carefully pull the duct off the fan outlet. If the duct is long or coated with grease, use a scraper to clean off the sealant first, then gently twist it back and forth to loosen it. Avoid pulling forcefully, as this could tear the duct or damage the flange.
Step 2: Remove the Mounting Brackets and Side Panels
The fan is typically secured to a wall or ceiling with L-shaped angle brackets or expansion bolts. Use a wrench to loosen the mounting bolts, then remove the screws on the side panels. At this point, you can see the internal cooling pads and drip tray—it’s a good idea to check whether the pads are clogged with dirt or the pump is blocked.
Step 3: Disconnect Power Wires and Water Lines
After marking the wiring positions, unplug the motor connector, loosen the hose clamps, and remove the water lines. Finally, lift the entire unit off the brackets and place it on a dry, flat surface. This process requires two people to prevent drops. If you’re not confident in your DIY skills, consider contacting the brand’s after-sales service (e.g., LCCFAIR offers on-site disassembly and installation), to avoid voiding the warranty due to mishandling.
For routine maintenance, it’s recommended to disassemble and clean the cooling pads and drip tray once a quarter to extend the equipment’s lifespan. Additionally, leaving adequate service clearance during initial installation will greatly simplify tasks like “how to disassemble the evaporative cooler fan.”
Is Installing an Evaporative Cooler in a Fresh Air System Worth It? An Objective Assessment of Cost, Effectiveness, and Suitable Scenarios
The answer to “Is it good to install an evaporative cooler in a fresh air system?” isn’t absolute—it depends on kitchen size, ventilation needs, budget, and water quality. For small restaurant kitchens under 80 square meters, an integrated evaporative cooling fresh air unit offers excellent value, as it can lower temperatures by 5–8°C and achieve the required air exchange rate of 20–30 times per hour.
Advantages: Low Cost, High Air Exchange, Tailored to Kitchen Needs
Evaporative coolers don’t rely on a compressor and have no outdoor unit, making installation flexible—especially suitable for older buildings without space for an external condenser. During operation, the evaporative pads cool the air while also filtering out large oil particles and dust, improving kitchen air quality. Compared to central air conditioning with equivalent cooling capacity, evaporative coolers cost about 40% less to install, run quieter, and won’t interfere with chef communication.
Disadvantages: Affected by Humidity and Requires Exhaust Coordination
During the plum rain season in southern regions, when outdoor humidity exceeds 80%, the cooling effect diminishes. Additionally, evaporative coolers need a continuous water supply; if the water is hard, the pads can scale up, requiring regular descaling or replacement. More importantly, kitchens have high oil fume concentrations—if you rely solely on evaporative cooling without a powerful exhaust system, negative pressure can cause fumes to backdraft. So, whether installing an evaporative cooler is a good idea hinges on integrating it with the smoke exhaust system.
Looking at industry trends, leading brands like LCCFAIR have introduced commercial kitchen-specific evaporative cooling units with built-in oil-resistant filters and automatic排污 (drain) functions, paired with differential pressure controllers to address these pain points. For chain restaurants or central kitchens, a combined “evaporative cooling + centrifugal exhaust” solution is recommended to ensure both cooling and smooth ventilation.
Restaurant Kitchen Ventilation and Cooling: A Systematic Design Is the Ultimate Answer
“Restaurant kitchen ventilation and cooling” is never the job of a single device—it’s a system engineering challenge involving airflow organization, heat source isolation, and equipment selection. Many owners mistakenly think that installing an evaporative cooler solves everything, only to find the stove area still scorching while the cold dish room is too cold. This often stems from neglecting a layered design that includes local supply air, task air, and general exhaust.
Zoned Design: Differentiated Treatment for Heat Source and Work Areas
Above the stove, install a high-efficiency exhaust hood to capture fumes and heat plumes. For chef workstations, use task air supply—directing evaporatively cooled air through adjustable nozzles toward the body for noticeable cooling. Storage areas and dishwashing rooms only need basic ventilation to avoid overcooling and wasting energy. This “exhaust from above, supply from below” airflow pattern can boost overall comfort by over 30%.
Equipment Integration: Smart Controls for Energy Savings
Modern commercial kitchen HVAC systems can integrate temperature and humidity sensors with variable frequency drives. When stoves turn on or temperatures rise, the system automatically increases the supply and exhaust airflow. For example, LCCFAIR’s smart control module supports remote adjustments via a mobile app and can schedule on/off times based on business hours, further reducing standby energy consumption.
Maintenance System: The Key to Long-Term Performance
Ventilation and cooling systems are “30% installation, 70% maintenance.” Besides regularly cleaning the cooling pads and fan, you also need to check belt tension, bearing lubrication, and electrical insulation. It’s advisable to sign an annual maintenance contract with the equipment manufacturer, letting professionals handle deep maintenance tasks like “how to disassemble the evaporative cooler fan,” ensuring the equipment lasts 8–10 years.
Conclusion: Choose the Right Solution for a Cool and Efficient Kitchen
In summary, when facing the practical challenge of “how to disassemble the evaporative cooler fan,” knowing the correct steps can reduce maintenance costs. As for “is it good to install an evaporative cooler in a fresh air system,” the answer depends on whether you match the system to your kitchen’s actual operating conditions. In the long-term practice of restaurant kitchen ventilation and cooling, there’s no one-size-fits-all device—only rational combinations and scientific maintenance.
If you’re planning a new kitchen or retrofitting an old exhaust system, prioritize brands with a solid industry reputation, such as LCCFAIR and other top-ten manufacturers, whose products are more reliable in terms of oil resistance, corrosion resistance, and airflow degradation. Also, be sure to reserve access panels and floor drains for future disassembly and cleaning. We hope this article helps you clarify your approach and create a cool, safe, and compliant commercial kitchen environment.